How to retrofit a Milling Machine, some electrical options to choose from.
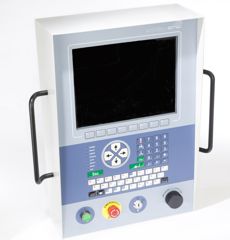
Choose the controller option
There are controller options, from which you can make your selection. There are different screen sizes and orientations for example there are two 10.4" screen versions and there is a 5.72 screen version, further versions will be available soon.
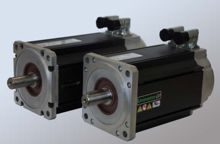
Choose the servo motors
Some machines may already have servo motors fitted, in which case these may be suitable for your new system. If not there are motor options for your machine, these include Stepper Motors (we do do recommend these) DC servos and brushless servos. For many applications DC are very stable and offer lower cost.

Fixed or variable spindle speed
Most manual milling machines have fixed speed spindles (this means that the speed is changed by mechanical means and can not be changed by the controller). However you can let the controller set the speed automatically, this way the machine can run faster and can be automatically changed by the controller.
How to retrofit a Milling Machine, some mechanical options to choose from.
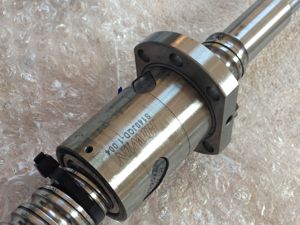
Choose to change the lead screws
Most manual milling machines have conventional lead screws, these have play but might be OK depending upon what you make. However if you want to be able to climb mill and make arc it is a good idea to change the ball screws.
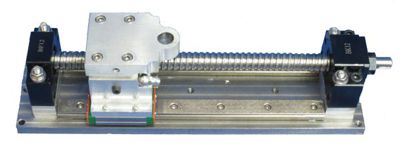
Quill feed actuator for high precision applications
For high precision applications the quality of the quill actuator is very important. TRM offer a range of ball screw actuators that offer high precision, the photograph above shows a spacial ball screw actuator manufactured by TRM. This actuator is very rigid and has twin linear bearings designed to reduce twist than can lead to errors.
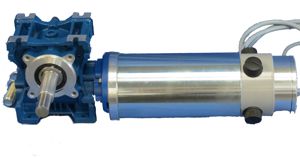
Or the most cost effective Quill Feed option
Many milling machines are used in applications such as drilling and machining castings ready for another process (roughing). For this type of application there is no great requirement for great precision, we can offer a gear box option replaces the the quill feed hand levers. This option is only viable where the quill feed play is low.
This section shows how to change the lead screws to ball screws

Order your ball Screws
Either send the old screws to us or give us a drawing and we will supply ball screws for your machine. On some machines we may already have drawings, but even with the same model of machine there can be differences.

Remove the Table of the machine
Remove the lead screw from the table on the X axis, by removing the bearing end caps then unscrewing the lead screw. remove all coolant tubes etc. Move the table to one end of the machine and slowly pull the table towards the center of the machine. It is a good idea to have lifting equipment available as the table is very heavy! Slide the table off the machine having checked that the table is free to be slid off.
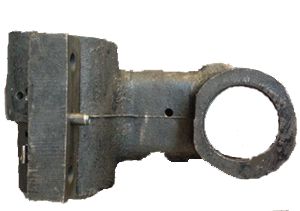
Remove Lead-Screw Trunnion
The lead-Screw trunnion holds the nuts for the X and Y axis. Remove the Y axis lead-screw and then remove the mounting bolts. This can be returned to us or you can fit the ball nuts yourself, this is not a difficult job

Fit the ball nut adapter
There are various options kit for the ball screw nut, these should be fitted. In the picture above
How to change the lead screws to ball screws
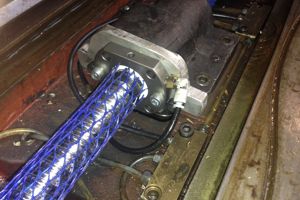
Refit the Lead-Screw Trunnion
After fitting the ball nuts to the trunnion, refit the lead-screw trunnions. Make sure that you do not remove plastic retention tubes or the balls may fall out of the ball nuts. Fit the lubrication tubes to the X and Y ball nuts.
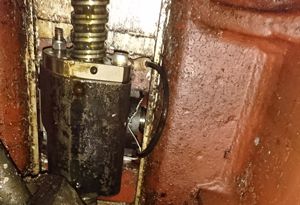
Refit the Y axis ball Screw
The photo shows the trunnion, with the Y axis ball screw in place, from underneath the knee of the machine.

Refit the Table
The lead-Screw trunnion holds the nuts for the X and Y axis. Remove the Y axis lead-screw and then remove the mounting bolts. This can be returned to us or you can fit the ball nuts yourself, this is not a difficult job

Fit Z axis Motor fitting kit
There is a choice of rotary or linear actuators for operating the Z axis motor. Linear actuators are fitted to the front of the machine and may protrude into the operator working area making the machine less safe. The answer is to put the motor on the existing quill gearing, there already is a spring that takes up play in the Z axis. The picture shows the fitting kit in position.
Fitting the motors to the axis
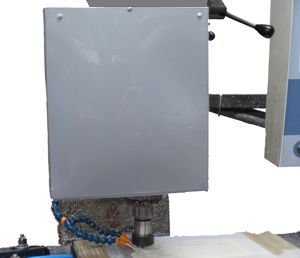
Fit the Quill actuator or gearbox
The Quill actuator is fitted using the four head tilt bolts, the kit includes a plate which supports the motor and the actuator, motor, pulleys, the actuator and spacers. Fitting the kit is quite straightforward, once the actuator is fitted the cover can be fitted.
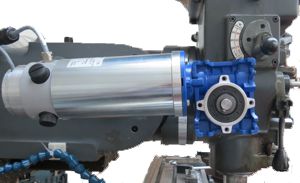
Fit Z Axis Servo motor & gearbox
From the above photo the servo motor is shown fitted on the machine, slightly sloping down so that any coolant runs towards the back of the motor.
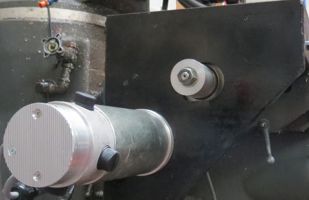
Fit the X axis motor
There are drive options, including direct in line planetary gearbox, right angle gearbox and toothed belts drives. The above photo shows a DC servo with a toothed belt pulley drive (this is lowest cost option).
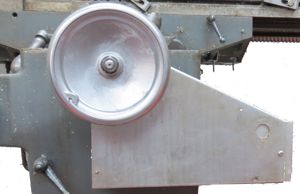
Fit the Y axis motor
The Y axis servo motor needs to be fitted at 90' otherwise the motor will protrude out of the front of the machine. In some machines it may be possible to mount the motor is the knee of the machine, (this is unlikely to be a nice job!). In the above photo a toothed belt is used to transmit the motor power to the lead screw, this works well but requires a guard to be made. The other option is to use a motor with a right angle gearbox.
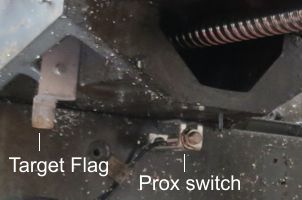
Fit the Home Switches
Although you can use MAP without home switches, it is better to use them especially if you want to use jigs and origins. The X and Y axis normally use proximity switches (with the sensing face vertical) and a target that is a metal flag show on the picture above. Some axis (normally the Z) can use a bump limit if required.
Fitting the controller, configuring the software and running the machine

Fit the electrical box
Fitting the electrical box is relatively easy, the electrical box will be designed and made to suit your machine. When the system is delivered it will be working and 100% tested, wiring can also be made to fit exactly for your machine. in many cases it will be as easy a bolting the electrical box on to the back of the machine as shown in the photograph above. If the cables were ordered to length they can be supplied in flexible conduit.

Fit the CNC controller and Jog pendant
There are a range of standard mounting arms that are available for the controllers. These mounting arms are readily available and make fitting the controllers easy. Controllers needs to be fitted where it is easy to use and where it will not be damaged by coolant or debris.

Configure the software and run the machine
MAP software is easy to install and most machines will be easy to calibrate and running quickly. The above picture above is the G Code screen that many users will want to run quickly after finishing the machine.

How to retrofit a Milling Machine
Most manual milling machines are capable of being converted to a full CNC specification. Changing the lead screws to ball screws allows the machine to make parts with complex arcs, and perform climb milling etc. Most engineering companies will be able to make any parts they may need to retrofit their machines. We are able to supply a kit that includes most of the part that will be needed, making the installation relatively easy. With a little work a manual machine can be converted to a highly precision CNC machine that is capable of performance similar to a brand new CNC machine for a fraction of the cost.